Showing posts with label Anna's Attic. Show all posts

Saturday, April 26, 2014

"Violet Vixen" CT tag and PTU tutorial for Anna's Attic

 
"Violet Vixen" CT tag and PTU tutorial for Anna's Attic
Artist: Arthur Crowe @ Arthur Crowe Factory
Purchase tube here
You must have a license to use his art.
Scrap Kit: "Violet Vixen" by Anna's Attic @ PFD
Purchase kit here
 
PSP - I use 9 but any version should work.
Mask: Mask of Choice
Supplies:

Artist:  Arthur Crowe @ Arthur Crowe FactoryPurchase tube here
Scrapkit: "Violet Vixen" by Anna's Attic @ PFD
Purchase kit here


Font: Aint Nothing Fancy
FILTERS USED:  Gaussian Blur, Luminence Legacy, Hard Light, Gradient Glow,  and Drop Shadow.
This tutorial was written by me on 4/26/2014, using my own ideas. Any resemblance to others is coincidental and accidental. This tutorial assumes you have a working knowledge of psp and is written in PSP9.
Please leave some love when downloading supplies. The artists/creators work hard to make/share their work with us, so let's be appreciative. Please use all correct copyright/license information and follow all TOU’s. Let’s give credit where credit is due.
As always, tutorials are only a guideline. If you don't have the exact supplies, use ones you have or ones you choose.

Ok let's begin. 
Open a new canvas 650x650
 Copy and paste on the bottom layer and resize as needed
Paper 9
and apply your mask of choice.  Over your mask Copy and paste Frame 5 and resize as needed.  Click inside the frame with your magic wand.  Modify, expand by 5.  Now copy and paste Paper 10 and then invert and delete on your keyboard.  Make sure you put your paper layer under the frame layer.  Now while still selected Copy and paste your tube of choice and resize and place where you want her.  Invert and delete on your keyboard.  Make sure your tube is under the frame but above the paper.  Dropshadow the tube and frame.
Merge your tubes together and duplicate once.  On the top duplicate Gaussian Blur 3 and then change the blend mode to Hard Light.  On the bottom duplicate change the blend mode to Luminance Legacy.


  Copy and Paste you main tube and resize as needed and place her where desired. Now add Porcelain default settings to your main tube.  Now you can place whatever elements you would like, resize as needed and place where desired.  Dropshadow your elements and your main tube. Now copy and paste the word art and place where desired.  Dropshadow.  Here are the elements I used:


Bottle 2
Bullett
Condom
Cuffs
Firestand
Flowers
Glass
Gun
Lipstick
Pierced Lips
Star Keychain
Thunderbolt
 
 
Add your copyrights and your name.
I used Aint Nothing Fancy for the name.
Merge all visible and save as PNG.
And your done.  Hope you enjoyed using my tutorial.

xoxo
Angie
 

Tuesday, April 22, 2014

"Fanta Sea" CT tag and PTU tutorial for Anna's Attic

 
"Fanta Sea" CT tag and PTU tutorial for Anna's Attic
Artist: Michael Landefeld @ Creative Design Outlet
You must have a license to use his art.
Scrap Kit: "FantaSea" by Anna's Attic @ Pics for Design
 
 
PSP - I use 9 but any version should work.
Mask: Mask of Choice
Supplies:

Artist:  Michael Landefeld @ Creative Design Outlet
Scrapkit:  "FantaSea" by Anna's Attic @ Pics for Design
Font: Ocean
FILTERS USED:  Gradient Glow, and Drop Shadow.
This tutorial was written by me on 4/22/2014, using my own ideas. Any resemblance to others is coincidental and accidental. This tutorial assumes you have a working knowledge of psp and is written in PSP9.
Please leave some love when downloading supplies. The artists/creators work hard to make/share their work with us, so let's be appreciative. Please use all correct copyright/license information and follow all TOU’s. Let’s give credit where credit is due.
As always, tutorials are only a guideline. If you don't have the exact supplies, use ones you have or ones you choose.

Ok let's begin. 
Open a new canvas 650x650
 Copy and paste on the bottom layer and resize as needed
Paper 9 and apply your mask of choice.  Merge group.

Copy and paste your main tube of choice and resize as needed and place where desired.  Now you can place whatever elements you would like, resize as needed and place where desired.   Dropshadow your elements and main tube.  Here are the elements I used:

Bubbles 3
Crab 3
Dolphin 3
Fish 7
Flower 1
Greens 1
Jelly Fish 2
Oyeter 1
Plant 3
Plant 5
Plant 6
Rock
Sea shell 2
Seahorse 2
Shark 1
Starfish 1
Stingray 2
Turtle 2
 
   Merge visible and add your copyrights and your name.
I used Ocean for the name.
Merge all visible and save as PNG.
And your done.  Hope you enjoyed using my tutorial.

xoxo
Angie

Wednesday, April 16, 2014

New CT tag and PTU tutorial for Anna's Attic "Happy Easter"

 
New CT tag and PTU tutorial for Anna's Attic "Happy Easter"
Artist: Elias Chatzoudis @ Elias Art Shop
Purchase here
You must have a license to use his art.
Scrap Kit: Spring Fling by Anna's Attic @ Mystical Scraps
Purchase here
 
 
PSP - I use 9 but any version should work.
Mask: Mask of Choice
Supplies:

Artist:  Elias Chatzoudis @ Elias Art ShopPurchase here
Scrapkit: Spring Fling by Anna's Attic @ Mystical Scraps
Purchase here


Font: Happy Easter
FILTERS USED:  Gaussian Blur, Luminance Legacy, Hard Light, Gradient Glow, and Drop Shadow.
This tutorial was written by me on 4/16/2014, using my own ideas. Any resemblance to others is coincidental and accidental. This tutorial assumes you have a working knowledge of psp and is written in PSP9.
Please leave some love when downloading supplies. The artists/creators work hard to make/share their work with us, so let's be appreciative. Please use all correct copyright/license information and follow all TOU’s. Let’s give credit where credit is due.
As always, tutorials are only a guideline. If you don't have the exact supplies, use ones you have or ones you choose.

Ok let's begin. 
Open a new canvas 650x650
 Copy and paste on the bottom layer and resize as needed
Paper 1
and apply your mask of choice.  Over your mask Copy and paste Frame 5 and resize as needed.  Click inside the frame with your magic wand.  Modify, expand by 5.  Now copy and paste Paper 3 and then invert and delete on your keyboard.  Make sure you put your paper layer under the frame layer.  Now while still selected Copy and paste your tube of choice and resize and place where you want her.  Invert and delete on your keyboard.  Make sure your tube is under the frame but above the paper. Do the same with the other two spots.  Dropshadow the tube and frame.  Merge your tubes together and duplicate once.  On the top duplicate Gaussian Blur 3 and then change the blend mode to Hard Light.  On the bottom duplicate change the blend mode to Luminance Legacy.

  Copy and Paste you main tube and resize as needed and place her where desired.  Now you can place whatever elements you would like, resize as needed and place where desired.  Dropshadow your elements and your main tube. Now copy and paste the word art and place where desired.  Dropshadow.  Here are the elements I used:


Barrell 2
Bee
Chicken
Cloud
Fence
Flower
Flower02
Flower03
Fork
Frog
Grass 01
Grass
Mushroom
Pond
Shovel
Sun
Tree with Swing
Watering Can
Wheel barrell
Windmill
Add your copyrights and your name.
I used Rabbit Ears for the name.
Merge all visible and save as PNG.
And your done.  Hope you enjoyed using my tutorial.

xoxo
Angie


New CT tag and FTU tutorial for Anna's Attic "Silent Spring"


New CT tag and FTU tutorial for Anna's Attic "Silent Spring"
Artist: Elias Chatzoudis @ Elias Art
Purchase here
You must have a license to use his art.
Scrap Kit: Slilent Spring by Anna's Attic which is a FTU kit
Download here
 
PSP - I use 9 but any version should work.
Mask: Mask of Choice
Supplies:

Artist:  Elias Chatzoudis @ Elias ArtPurchase here
Scrapkit: Slilent Spring by Anna's Attic which is a FTU kit
Download here


Font: Rabbit Ears
FILTERS USED:  Gradient Glow, and Drop Shadow.
This tutorial was written by me on 4/16/2014, using my own ideas. Any resemblance to others is coincidental and accidental. This tutorial assumes you have a working knowledge of psp and is written in PSP9.
Please leave some love when downloading supplies. The artists/creators work hard to make/share their work with us, so let's be appreciative. Please use all correct copyright/license information and follow all TOU’s. Let’s give credit where credit is due.
As always, tutorials are only a guideline. If you don't have the exact supplies, use ones you have or ones you choose.

Ok let's begin. 
Open a new canvas 650x650
 Copy and paste on the bottom layer and resize as needed
Paper 2
and apply your mask of choice.  Over your mask Copy and paste Frame 5 and resize as needed.  Click inside the frame with your magic wand.  Modify, expand by 5.  Now copy and paste Paper 1 and then invert and delete on your keyboard.  Make sure you put your paper layer under the frame layer.  Now while still selected Copy and paste your tube of choice and resize and place where you want her.  Invert and delete on your keyboard.  Make sure your tube is under the frame but above the paper. Do the same with the other two spots.  Dropshadow the tube and frame.  Merge your tubes together and duplicate once.  On the top duplicate Gaussian Blur 3 and then change the blend mode to Hard Light.  On the bottom duplicate change the blend mode to Luminance Legacy.

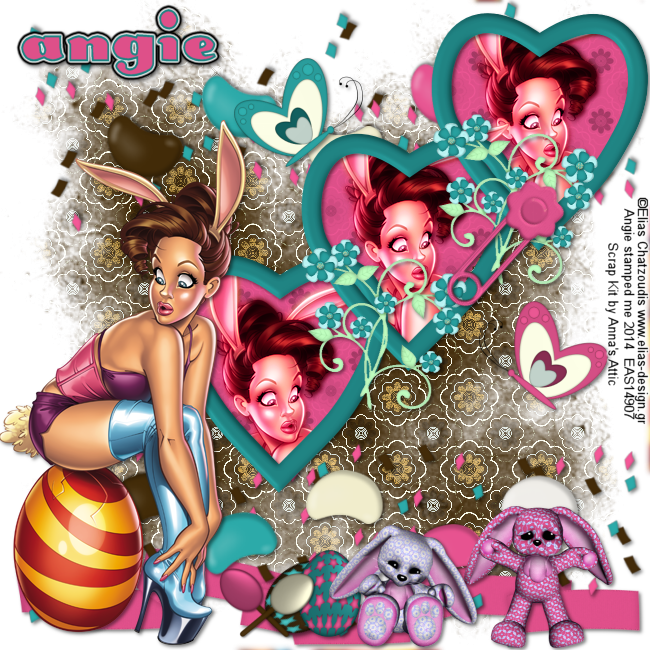
  Copy and Paste you main tube and resize as needed and place her where desired.  Now you can place whatever elements you would like, resize as needed and place where desired.  Dropshadow your elements and your main tube. Now copy and paste the word art and place where desired.  Dropshadow.  Here are the elements I used:


Butterfly 1
Butterfly 2
Egg Pop 1
Egg Pop 2
Fried Egg 1
Fried Egg 2
Jelly Bean Confetti
Pin 1
Rabbit 1
Rabbit 2
Ribbon 2


Add your copyrights and your name.
I used Rabbit Ears for the name.
Merge all visible and save as PNG.
And your done.  Hope you enjoyed using my tutorial.

xoxo
Angie
Wednesday, March 19, 2014

New CT tag and PTU tutorial for Anna's Attic "Spring Fling"


New CT tag and PTU tutorial for Anna's Attic "Spring Fling"
Artist: Alehandra_Vanhek @ PFD
Scrapkit: Spring Fling by Anna's Attic @ Mystical Scraps

PSP - I use 9 but any version should work.
Mask: Mask of Choice
Supplies:
Artist:  Alehandra_Vanhek @ PFD

Scrapkit: Spring Fling by Anna's Attic @ Mystical Scraps


Font: Blessed Day
FILTERS USED: Gaussian Blur, Hard Light,Gradient Glow, Luminance Legacy and Drop Shadow.
This tutorial was written by me, March 19, 2014.  Any resemblance to any other tutorial is purely coincidental.  Please do not claim it as your own.

Ok let's begin. 
Open a new canvas 650x650
 Copy and paste Frame 2, and resize as needed.  Click inside with the magic wand and Modify, Expand by 10.  Copy and paste Paper 1, resize as needed and then invert and hit delete on keyboard.  Make sure the paper is under your frame.  While still selected, copy and paste your close up tube of choice, resize as needed and place where you want her. Duplicate close up tube and on the top tube layer Adjust Gaussian Blur 10.  Then change the blend mode to Hard Light. Then on the bottom tube layer change the blend mode to Luminance Legacy.  Dropshadow your frame and tube.  Make sure your tube and paper are under the frame.  Copy and paste on the bottom layer and resize as needed Paper 10 and apply your mask of choice.

Copy and paste your main tube of choice and resize as needed and place where desired.  Now you can place whatever elements you would like, resize as needed and place where desired.  Dropshadow your elements and main tube.  Here are the elements I used:


Bee
Chicken
Cloud
Flower 4
Flower
Frog
Grass
Mushroom
Pond
Sun
Tree with Swing
Watering Can
Windmill

Add your copyrights and your name.
I used Blessed Day for the name.
Merge all visible and save as PNG.
And your done.  Hope you enjoyed using my tutorial.

xoxo
Angie

Thursday, December 12, 2013

New CT Tag for Artistically Inclined Licensing PTU "Fairies Speak"


 CT Tag and Tut
Fairies Speak

Happy December  everyone!!  Here is a new tut for you called Fairies Speak.  I used a PTU scrapkit  from Anna's Attic which you can purchase at Artistically Inclined Licensing.       I also used the amazing art of Mike Denning which you can purchase at Artistically Inclined Licensing Here.
 You must have a license to use his art.

PSP - I use 9 but any version should work.
Mask: No Mask
Supplies:
Scrapkit: PTU kit by Anna's Attic called Fairies Speak  Here
Tube of Choice
I used Michael Miles at Artistically Inclined Licensing
Font: FairyDust
FILTERS USED:
None
This tutorial was written by me, December 12, 2013.  Any resemblance to any other tutorial is purely coincidental.  Please do not claim it as your own.

Ok let's begin. 

Open a new canvas 600x600
Copy and Paste Frame 2 and resize as needed, place where you would like.  Click inside frame with magic wand and modify, expand, 5.  Copy and Paste Paper 1, Invert and then delete.  Copy and Paste Close up tube while still selected, resize and place where desired in the frame.  Invert and delete.  Drop shadow tube and frame.  Make sure your paper is on bottom and then tube on top of paper and frame above tube.
Copy and paste main tube of choice and place where desired and resize if needed.  Drop Shadow your tube.  Copy and paste doodle 2 and resize and place at the bottom of your canvas and put as bottom layer.  Duplicate and flip.  Add any other elements you would like, resize and drop shadow all elements.  Here are the elements I used:
Bow
Candle
Castle
Flower 5
Jewel Wand
Mushroom House 2
Perfume Bottle
Unicorn 2

Add your copyrights and your name.
I used Fairy Dust for the name.
Merge all visible and save as PNG.
And your done.  Hope you enjoyed using my tutorial.

xoxo
Angie