
Showing posts with label Spring. Show all posts

Saturday, June 4, 2022

"Mommy Cuddles" CT for Scraps N Company


"Mommy Cuddles" CT for Scraps N Company
Kit is "Mommy Cuddles" by Luscious Ladee @ SNCO
This kit has 115 elements, 25 papers and 6 tubes
Tube is included in this kit and is by ©Yuki
It comes in 6 different color combinations and 
you can only use it with this kit.
All available @ Scraps N Company


Font Blessed Day
Mask: Any of your choice

FILTERS USED:  Gradient Glow, and Drop Shadow.

This tutorial was written by me on 6/4/2022, using my own ideas. Any resemblance to others is coincidental and accidental. This tutorial assumes you have a working knowledge of psp and is written in PSP9.

Please leave some love when downloading supplies. The artists/creators work hard to make/share their work with us, so let's be appreciative. Please use all correct copyright/license information and follow all TOU’s. Let’s give credit where credit is due.

As always, tutorials are only a guideline. If you don't have the exact supplies, use ones you have or ones you choose.


Ok let's begin. 

Copy and paste Paper 10 and apply your mask.  Merge group. 

Copy and paste your main tube of choice,  and resize as needed and place where desired.  Add dropshadow to the tube.

Now you can place whatever elements you would like, resize as needed and place where desired.   Dropshadow your elements and main tube.  Here are the elements I used:


3
4
6
10
13
23
24
27
32
33
34
37
40
42
50
51
73
75
79
80
86
87
93
97
103
108


Merge visible and add your copyrights and your name.

I used Blessed Day font for the name.

Merge all visible and save as PNG.

And your done.  Hope you enjoyed using my tutorial.

xoxo

Angie 

Saturday, April 22, 2017

"Fairy Doll" CT for Designz by Sue


PSP - I use 9 but any version should work.
Supplies:

Andy Cooper tube called "Fairy Fungus"
Tube which you can get here at Scraps N Company
You must have a license to use her art.

Kit called "Doll Fairy 3" by Designz by Sue
Kit which you can get here Scraps N Company


Mask of choice

 Font: Fairy Wings

FILTERS USED:  Gradient Glow, and Drop Shadow.
This tutorial was written by me on 4/22/2017, using my own ideas. Any resemblance to others is coincidental and accidental. This tutorial assumes you have a working knowledge of psp and is written in PSP9.
Please leave some love when downloading supplies. The artists/creators work hard to make/share their work with us, so let's be appreciative. Please use all correct copyright/license information and follow all TOU’s. Let’s give credit where credit is due.
As always, tutorials are only a guideline. If you don't have the exact supplies, use ones you have or ones you choose.

Ok let's begin. 
Open a new canvas 650x650
Copy and paste Paper 007 and apply your mask.  Merge group. 
Copy and paste your main tube of choice,  and resize as needed and place where desired.  Add dropshadow to the tube.
Now you can place whatever elements you would like, resize as needed and place where desired.   Dropshadow your elements and main tube.  Here are the elements I used:

002
005
006
007
008
009
010
011
012
014
018
022
023
024
025
026
027
028
062


 Merge visible and add your copyrights and your name.
I used Fairy Wings font for the name.
Merge all visible and save as PNG.
And your done.  Hope you enjoyed using my tutorial.
xoxo
Angie

Saturday, May 30, 2015

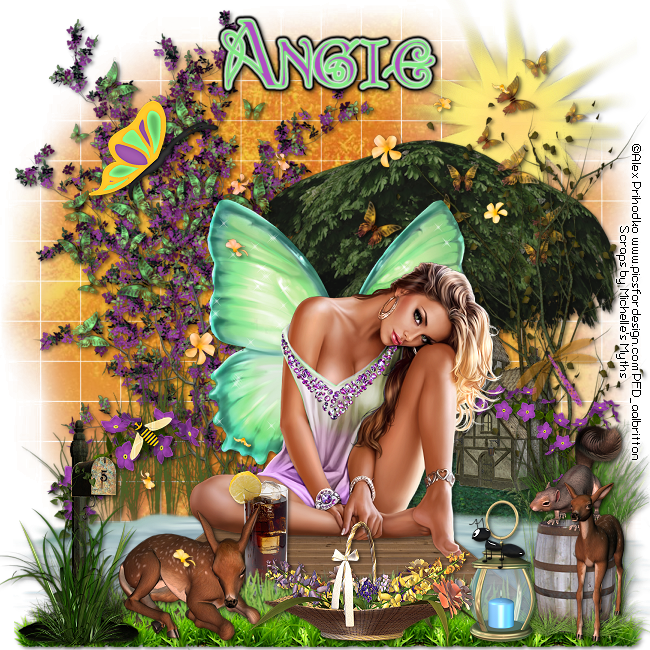
"Butterfly Garden" CT for Michelle's Myths


"Butterfly Garden" CT for Michelle's Myths

PSP - I use 9 but any version should work.
Supplies:

Artist: "Butterfly" by Alex Prihodko @ PFD
You must have a license to use this art.

Scrap Kit: "Butterfly Garden" by Michelle's Myths
And here: Smiley Creations


Mask of choice

 Font: buGlenda

FILTERS USED:  Gradient Glow, and Drop Shadow.
This tutorial was written by me on 5/30/2015, using my own ideas. Any resemblance to others is coincidental and accidental. This tutorial assumes you have a working knowledge of psp and is written in PSP9.
Please leave some love when downloading supplies. The artists/creators work hard to make/share their work with us, so let's be appreciative. Please use all correct copyright/license information and follow all TOU’s. Let’s give credit where credit is due.
As always, tutorials are only a guideline. If you don't have the exact supplies, use ones you have or ones you choose.

Ok let's begin. 
Open a new canvas 650x650
Copy and paste Paper 2 and apply your mask.  Merge group. 
Copy and paste your main tube of choice,  and resize as needed and place where desired.  Add dropshadow to the tube.
Now you can place whatever elements you would like, resize as needed and place where desired.   Dropshadow your elements and main tube.  Here are the elements I used:

1
7
8
11
19
20
23
34
35
36
38
42
43
44
45
46
48
59
63
70
72
75
78
86
88
90
95
96
98

 Merge visible and add your copyrights and your name.
I used buGlenda for the name.
Merge all visible and save as PNG.
And your done.  Hope you enjoyed using my tutorial.
xoxo
Angie
"Ladybug Love" CT for CDO Scraps / TammyKat Dezigns


"Ladybug Love" CT for CDO Scraps / TammyKat Dezigns

PSP - I use 9 but any version should work, and Animation Shop
Supplies:

Artist: "Liwanag-46-3" by Anna Liawanag @ CDO
You must have a license to use her art.

Scrap Kit: "ScrapTK_LadyBug-mini" @ CDO


Mask of choice

 Font: LadyBug

FILTERS USED:  Gradient Glow, and Drop Shadow.
This tutorial was written by me on 5/30/2015, using my own ideas. Any resemblance to others is coincidental and accidental. This tutorial assumes you have a working knowledge of psp and is written in PSP9.
Please leave some love when downloading supplies. The artists/creators work hard to make/share their work with us, so let's be appreciative. Please use all correct copyright/license information and follow all TOU’s. Let’s give credit where credit is due.
As always, tutorials are only a guideline. If you don't have the exact supplies, use ones you have or ones you choose.

Ok let's begin. 
Open a new canvas 650x650
Copy and paste Paper 3 and apply your mask.  Merge group.  Copy and paste Frame 3 resize as needed.  Click inside with your magic wand and selections, modify, expand by 5.  Copy and paste Paper 2.  Invert and delete on your keyboard.
Copy and paste your main tube of choice,  and resize as needed and place where desired.  Add dropshadow to the tube. Now you can place whatever elements you would like, resize as needed and place where desired.   Dropshadow your elements and main tube.  Here are the elements I used:

Element 1
Element 2
Element 3
Element 5
Element 6
Element 7
Element 8
Element 12
Element 15
Element 19
Element 20
Element 21
Element 23
Element 28
Wordart 2

 Merge visible and add your copyrights and your name.
I used LadyBug for the name.
Merge all visible and save as PNG.
And your done.  Hope you enjoyed using my tutorial.
xoxo
Angie

Thursday, May 28, 2015

"Bee-You-Tiful" CT for S&CO / Ishika Chowdhury / Bibi's Collection


"Bee-You-Tiful" CT for S&CO / Ishika Chowdhury / Bibi's Collection

PSP - I use 9 but any version should work.
Supplies:

Artist: "Peony" by Ishika Chowdhury @ S&CO
You must have a license to use her art.

Scrap Kit: "Peony" by Bibi's Collection @ S&CO


Mask of choice

 Font: Save The Honey Bees

FILTERS USED:  Gradient Glow, and Drop Shadow.
This tutorial was written by me on 5/28/2015, using my own ideas. Any resemblance to others is coincidental and accidental. This tutorial assumes you have a working knowledge of psp and is written in PSP9.
Please leave some love when downloading supplies. The artists/creators work hard to make/share their work with us, so let's be appreciative. Please use all correct copyright/license information and follow all TOU’s. Let’s give credit where credit is due.
As always, tutorials are only a guideline. If you don't have the exact supplies, use ones you have or ones you choose.

Ok let's begin. 
Open a new canvas 650x650
Copy and paste Paper 1 and apply your mask.  Merge group. 
Copy and paste your main tube of choice,  and resize as needed and place where desired.  Add dropshadow to the tube.
Now you can place whatever elements you would like, resize as needed and place where desired.   Dropshadow your elements and main tube.  Here are the elements I used:

Elems 3
Elems 5
Elems 7
Elems 8
Elems 18
Elems 19
Elems 33
Elems 36
Elems 41
Elems 42
Elems 44
Elems 56
Elems 61
Elems 67
Elems 71
Elems 73
Elems 74
Elems 78
Elems 79
Elems 81
Elems 83
Elems 84
Elems 85

 Merge visible and add your copyrights and your name.
I used Save The Honey Bees for the name.
Merge all visible and save as PNG.
And your done.  Hope you enjoyed using my tutorial.
xoxo
Angie

Friday, May 15, 2015

"Audrey's Ladybug Garden" CT for Ishika Chowdhury


"Audrey's Ladybug Garden" CT for Ishika Chowdhury

Artist: "Audrey" by Ishika Chowdhury @ S&CO
You must have a license to use her art.

Scrap Kit: "Ladybug Garden" by Tasha's Playground


PSP - I use 9 but any version should work.
Supplies:

Mask of choice

Artist: "Audrey" by Ishika Chowdhury @ S&CO
You must have a license to use her art.

Scrap Kit: "Ladybug Garden" by Tasha's Playground

 Font: New Garden

FILTERS USED:  Gradient Glow, and Drop Shadow.
This tutorial was written by me on 5/15/2015, using my own ideas. Any resemblance to others is coincidental and accidental. This tutorial assumes you have a working knowledge of psp and is written in PSP9.
Please leave some love when downloading supplies. The artists/creators work hard to make/share their work with us, so let's be appreciative. Please use all correct copyright/license information and follow all TOU’s. Let’s give credit where credit is due.
As always, tutorials are only a guideline. If you don't have the exact supplies, use ones you have or ones you choose.

Ok let's begin. 
Open a new canvas 650x650
Copy and paste Paper 1 and apply your mask.  Merge group. 
Copy and paste your main tube of choice,  and resize as needed and place where desired.  Add dropshadow to the tube.
Now you can place whatever elements you would like, resize as needed and place where desired.   Dropshadow your elements and main tube.  Here are the elements I used:

bush
butterfly
clothesline
cloud
flower1
flower6
flowermug
grass2
ladybug
ladybug2
ladybug3
lights
sun
tree
watercan

 Merge visible and add your copyrights and your name.
I used New Garden for the name.
Merge all visible and save as PNG.
And your done.  Hope you enjoyed using my tutorial.
xoxo
Angie

Thursday, May 7, 2015

"All Things Grow With Love" CT for Monti Scraps


"All Things Grow With Love" CT for Monti Scraps
Artist: "Margarita" by Alicia Mujica
Tube here
You must have a license to use her art.
Scrap Kit: "ScrapMonti_IB-AliciaMujica-Exclusive13C" by Monti Scraps @ CDO
Kit here
 
 
PSP - I use 9 but any version should work.
Supplies:

Mask of choice

Artist: "Margarita" by Alicia Mujica
Tube here
You must have a license to use her art.
Scrap Kit: "ScrapMonti_IB-AliciaMujica-Exclusive13C" by Monti Scraps @ CDO
Kit here

 Font: New Garden

FILTERS USED:  Gradient Glow, and Drop Shadow.
This tutorial was written by me on 5/7/2015, using my own ideas. Any resemblance to others is coincidental and accidental. This tutorial assumes you have a working knowledge of psp and is written in PSP9.
Please leave some love when downloading supplies. The artists/creators work hard to make/share their work with us, so let's be appreciative. Please use all correct copyright/license information and follow all TOU’s. Let’s give credit where credit is due.
As always, tutorials are only a guideline. If you don't have the exact supplies, use ones you have or ones you choose.

Ok let's begin. 
Open a new canvas 650x650
Copy and paste Paper 5 and apply your mask.  Merge group. 
Copy and paste your main tube of choice,  and resize as needed and place where desired.  Add dropshadow to the tube.
Now you can place whatever elements you would like, resize as needed and place where desired.   Dropshadow your elements and main tube.  Here are the elements I used:

Element 1
Element 2
Element 3
Element 4
Element 5
Element 6
Element 7
Element 11
Element 12
Element 13
Element 14
Element 15
Element 17
Element 18
Element 24
Element 28
WordArt-withGlow

 Merge visible and add your copyrights and your name.
I used New Garden for the name.
Merge all visible and save as PNG.
And your done.  Hope you enjoyed using my tutorial.
xoxo
Angie
 

Wednesday, May 6, 2015

"One Fine Spring Day" CT for Dance In The Rain


"One Fine Spring Day" CT for Dance In The Rain

Artist: "My Cat" by VeryMany
You must have a license to use this art.

Scrap Kit: "Spring Passion" by Dance In The Rain
Or here: Smiley Creations


PSP - I use 9 but any version should work.
Supplies:

Mask of choice

Artist: "My Cat" by VeryMany
You must have a license to use this art.

Scrap Kit: "Spring Passion" by Dance In The Rain
Or here: Smiley Creations


 Font: New Garden

FILTERS USED:  Gradient Glow, and Drop Shadow.
This tutorial was written by me on 5/6/2015, using my own ideas. Any resemblance to others is coincidental and accidental. This tutorial assumes you have a working knowledge of psp and is written in PSP9.
Please leave some love when downloading supplies. The artists/creators work hard to make/share their work with us, so let's be appreciative. Please use all correct copyright/license information and follow all TOU’s. Let’s give credit where credit is due.
As always, tutorials are only a guideline. If you don't have the exact supplies, use ones you have or ones you choose.

Ok let's begin. 
Open a new canvas 650x650
Copy and paste Paper 12 and apply your mask.  Merge group. 
Copy and paste your main tube of choice,  and resize as needed and place where desired.  Add dropshadow to the tube.
Now you can place whatever elements you would like, resize as needed and place where desired.   Dropshadow your elements and main tube.  Here are the elements I used:


3
9
12
13
15
17
22
26
62
71
74
88
90
104
121
123
124
152
156
161
167
175


 Merge visible and add your copyrights and your name.
I used New Garden for the name.
Merge all visible and save as PNG.
And your done.  Hope you enjoyed using my tutorial.
xoxo
Angie


Friday, April 10, 2015

"Nora" CT for Ishika Chowdhury


"Nora" CT for Ishika Chowdhury

Artist: "Fairy Nora" by Ishika Chowdhury @ S&CO
You must have a license to use her art.

Scrap Kit: "Dreams of Spring" by Disturbed Scraps @ S&CO


PSP - I use 9 but any version should work.
Supplies:

Mask of choice


Artist: "Flora Fairy" by Ishika Chowdhury @ S&CO
You must have a license to use her art.

Scrap Kit: "Dreams of Spring" by Disturbed Scraps @ S&CO

 Font: bu Glenda

FILTERS USED:  Gradient Glow, and Drop Shadow.
This tutorial was written by me on 4/10/2015, using my own ideas. Any resemblance to others is coincidental and accidental. This tutorial assumes you have a working knowledge of psp and is written in PSP9.
Please leave some love when downloading supplies. The artists/creators work hard to make/share their work with us, so let's be appreciative. Please use all correct copyright/license information and follow all TOU’s. Let’s give credit where credit is due.
As always, tutorials are only a guideline. If you don't have the exact supplies, use ones you have or ones you choose.

Ok let's begin. 
Open a new canvas 650x650
Copy and paste Paper 11 and apply your mask.  Merge group. 
Copy and paste your main tube of choice,  and resize as needed and place where desired.  Add dropshadow to the tube.
Now you can place whatever elements you would like, resize as needed and place where desired.   Dropshadow your elements and main tube.  Here are the elements I used:


Element 1
Element 2
Element 4
Element 19
Element 24
Element 35
Element 36
Element 37
Element 43
Element 44
Element 45
Element 46
Element 47
Element 52
Element 57
Element 61
Element 63
Element 68
Element 83
Element 84


 Merge visible and add your copyrights and your name.
I used bu Glenda for the name.
Merge all visible and save as PNG.
And your done.  Hope you enjoyed using my tutorial.
xoxo
Angie

Thursday, April 9, 2015

"Garden Party" CT for Mellie Beans


"Garden Party"  CT for Mellie Beans

Artist: "Margarita" by Alicia Mujica
You must have a license to use her art.

Scrap Kit: "Garden Party" by Mellie Beans
Kit Here: Mystical Scraps


PSP - I use 9 but any version should work.

Supplies:

Mask of choice


Artist: "Margarita" by Alicia Mujica
You must have a license to use her art.

Scrap Kit: "Garden Party" by Mellie Beans
Kit Here: Mystical Scraps


Font: New Garden

FILTERS USED:  Gradient Glow, and Drop Shadow.

This tutorial was written by me on 4/9/2015, using my own ideas. Any resemblance to others is coincidental and accidental. This tutorial assumes you have a working knowledge of psp and is written in PSP9.
Please leave some love when downloading supplies. The artists/creators work hard to make/share their work with us, so let's be appreciative. Please use all correct copyright/license information and follow all TOU’s. Let’s give credit where credit is due.
As always, tutorials are only a guideline. If you don't have the exact supplies, use ones you have or ones you choose.

Ok let's begin. 
Open a new canvas 650x650
Copy and paste Paper 1 and apply your mask.  Merge group.  I duplicated my mask a couple of times and merged down.
Copy and paste Tulip Frame resize as needed and then copy and paste Vine Under Tulip Frame and resize if needed.  Click inside the Tulip frame with the magic wand then Selections, Modify, Expand by 5.  Copy and paste Paper 7 and resize as needed.  Then Selections, Invert and then hit delete on your keyboard.  While still selected, Copy and paste your closeup tube and place where desired inside the frame, resize if needed.  Selections, invert and delete.  Sharpen your frame and add dropshadow to your frame and tube.

 Now you can place whatever elements you would like, resize as needed and place where desired.   Dropshadow your elements and main tube.  Here are the elements I used:

Angel Statue
Bird Bath
Bird 1
Bird 2
Birdhouse
Bow
Bush
Butterfly1
Butterfly2
Dragonfly
Flower Box
Flowers2
Grass Border
Grass
Old Bottle
Rabbit Statue
Sparks
Stone
Terra Cotta Pots
Watering Can


 Merge visible and add your copyrights and your name.
I used New Garden for the name.
Merge all visible and save as PNG.
And your done.  Hope you enjoyed using my tutorial.

xoxo
Angie

"Bunny Ears" CT for Scraps N Company


"Bunny Ears" CT for Scraps N Company

Artist: "Bunny Bombshells" by GraphFreaks @ S&CO
You must have a license to use her art.

Scrap Kit: "Bunny Ears" by DNScraps @ S&CO


PSP - I use 9 but any version should work.
Supplies:

Mask of choice


Artist: "Bunny Bombshells" by GraphFreaks @ S&CO
You must have a license to use her art.

Scrap Kit: "Bunny Ears" by DNScraps @ S&CO

 Font: Happy Easter

FILTERS USED:  Gradient Glow, and Drop Shadow.
This tutorial was written by me on 4/9/2015, using my own ideas. Any resemblance to others is coincidental and accidental. This tutorial assumes you have a working knowledge of psp and is written in PSP9.
Please leave some love when downloading supplies. The artists/creators work hard to make/share their work with us, so let's be appreciative. Please use all correct copyright/license information and follow all TOU’s. Let’s give credit where credit is due.
As always, tutorials are only a guideline. If you don't have the exact supplies, use ones you have or ones you choose.

Ok let's begin. 
Open a new canvas 650x650
Copy and paste Paper 1 and apply your mask.  Merge group. 
Copy and paste your main tube of choice,  and resize as needed and place where desired.  Add dropshadow to the tube.
Now you can place whatever elements you would like, resize as needed and place where desired.   Dropshadow your elements and main tube.  Here are the elements I used:

Bird
Bridge
Bubbles
Bunny
Butterfly
Fence
Frog
HouseMagic
LadyBug
Latterns
Law2
Lawn
Tree
Mushroom
PotBunny
Squirrel
Starss
Swing
Tulips
Waterfall
WaterinCan
Wheat2


 Merge visible and add your copyrights and your name.
I used Happy Easter for the name.
Merge all visible and save as PNG.
And your done.  Hope you enjoyed using my tutorial.
xoxo
Angie

Thursday, March 26, 2015

"Sweet Easter" CT for CDO Scraps / Ladyhawwk Designs


"Sweet Easter" CT for CDO Scraps / Ladyhawwk Designs

Artist: "Anna Marine Individual Tube 45-3" by Anna Marine @ CDO
You must have a license to use her art.

Scrap Kit: "ScrapLHD_IB-AnnaMarine-45-3" by Ladyhawwk Designs @ CDO


PSP - I use 9 but any version should work.

Supplies:

Mask of choice


Artist: "Anna Marine Individual Tube 45-3" by Anna Marine @ CDO
You must have a license to use her art.

Scrap Kit: "ScrapLHD_IB-AnnaMarine-45-3" by Ladyhawwk Designs @ CDO


Font: Cocktail Script

FILTERS USED:  Gradient Glow, and Drop Shadow.

This tutorial was written by me on 3/26/2015, using my own ideas. Any resemblance to others is coincidental and accidental. This tutorial assumes you have a working knowledge of psp and is written in PSP9.
Please leave some love when downloading supplies. The artists/creators work hard to make/share their work with us, so let's be appreciative. Please use all correct copyright/license information and follow all TOU’s. Let’s give credit where credit is due.
As always, tutorials are only a guideline. If you don't have the exact supplies, use ones you have or ones you choose.

Ok let's begin. 
Open a new canvas 650x650
Copy and paste Paper 1 and apply your mask.  Merge group.  I duplicated my mask a couple of times and merged down.

Copy and paste Frame 2 resize as needed and then with your freehand tool draw around  the frame and then Selections, Modify, Expand by 5.  Copy and paste Paper 2 and resize as needed.  Then Selections, Invert and then hit delete on your keyboard.  While still selected, Copy and paste your closeup tube and place where desired inside the frame, resize if needed.  Selections, invert and delete.  Sharpen your frame and add dropshadow to your frame and tube.

 Now you can place whatever elements you would like, resize as needed and place where desired.   Dropshadow your elements and main tube.  Here are the elements I used:

Ele2
Ele3
Ele5
Ele7
Ele13
Ele15
Ele16
Ele18
Ele19
Ele20
Ele21
Ele22
Ele23


 Merge visible and add your copyrights and your name.
I used Cocktail Script for the name.
Merge all visible and save as PNG.
And your done.  Hope you enjoyed using my tutorial.

xoxo
Angie

Monday, March 23, 2015

"Citrus Bliss" CT for Mellie Beans


"Citrus Bliss" CT for Mellie Beans

Artist: "Spring" by Alex Prihodko @ PFD
You must have a license to use this art.

Scrap Kit: "Citrus Bliss" by Mellie Beans
Or here: Mystical Scraps


PSP - I use 9 but any version should work.

Supplies:

Mask: RR_MaskSet48_Mask4 included in the kit.


Artist: "Spring" by Alex Prihodko @ PFD
You must have a license to use this art.

Scrap Kit: "Citrus Bliss" by Mellie Beans
Or here: Mystical Scraps


Font: Feel Script

FILTERS USED:  Gradient Glow, MM Copies, and Drop Shadow, Luminance Legacy, and Gaussian Blur.

This tutorial was written by me on 3/23/2015, using my own ideas. Any resemblance to others is coincidental and accidental. This tutorial assumes you have a working knowledge of psp and is written in PSP9.
Please leave some love when downloading supplies. The artists/creators work hard to make/share their work with us, so let's be appreciative. Please use all correct copyright/license information and follow all TOU’s. Let’s give credit where credit is due.
As always, tutorials are only a guideline. If you don't have the exact supplies, use ones you have or ones you choose.

Ok let's begin. 
Open a new canvas 650x650
Copy and paste Orange and yellow deco Paper and apply your mask.  Merge group.  I duplicated my mask a couple of times and merged down.

I made the frame by copying and pasting Frame 4 and resized to 80% then I copied and pasted Flower06 over top and resized  to 20 % then I applied Mura Meisters Copies and changed the X and Y to 70 and click ok. Then under the  frame I copied and pasted  Yellow deco Paper, then I used my freehand tool and traced the frame.  Then I Selections, Modified, Expanded by 5.   Then Selections, Invert and then hit delete on your keyboard on the paper layer.  While still selected, Copy and paste your closeup tube and place where desired inside the frame, resize if needed.  Selections, invert and delete.  Sharpen your frame and add dropshadow to your frame and tube.  Before I added the drop shadow, I duplicated my close up tube and on the top layer I added Gaussian Blur of 5, then I changed the Blend Mode to Hard Light and on the bottom tube layer I changed the blend mode to Luminance Legacy.  Then I put a drop shadow on the bottom layer tube.

 Now you can place whatever elements you would like, resize as needed and place where desired.   Dropshadow your elements and main tube.  Here are the elements I used:

Bow01
Flower01
Flower02
Flower03
Flower04
Green gingham button
Jar
Leaves
Limeade
Market Basket
Old glass bottle
Orange gingham button
Ribbon 01
sparkles
Spool of Ribbon
Whole Lemon
Whole Lime
Whole Orange
Yellow gingham button


 Merge visible and add your copyrights and your name.
I used Feel Script for the name.
Merge all visible and save as PNG.
And your done.  Hope you enjoyed using my tutorial.

xoxo
Angie

Thursday, March 19, 2015

"Cheryle" CT for Ishika Chowdhury


"Cheryle" CT for Ishika Chowdhury

Artist: "Cheryle" by Ishika Chowdhury
You must have a license to use her art.

Scrap Kit: "Spring is in the Air" by Claudia's Creationz

***This blog where the kit was is now removed.  I cannot share this kit.  You can use any kit you like and use my tag as a reference.***


PSP - I use 9 but any version should work.

Supplies:

Mask of choice


Artist: "Cheryle" by Ishika Chowdhury
You must have a license to use her art.

Scrap Kit: "Spring is in the Air" by Claudia's Creationz

***This blog where the kit was is now removed.  I cannot share this kit.  You can use any kit you like and use my tag as a reference.***

Font: Foglihten No 07

FILTERS USED:  Gradient Glow, and Drop Shadow.

This tutorial was written by me on 3/19/2015, using my own ideas. Any resemblance to others is coincidental and accidental. This tutorial assumes you have a working knowledge of psp and is written in PSP9.
Please leave some love when downloading supplies. The artists/creators work hard to make/share their work with us, so let's be appreciative. Please use all correct copyright/license information and follow all TOU’s. Let’s give credit where credit is due.
As always, tutorials are only a guideline. If you don't have the exact supplies, use ones you have or ones you choose.

Ok let's begin. 
Open a new canvas 650x650
Copy and paste Paper 6 and apply your mask.  Merge group.  I duplicated my mask a couple of times and merged down.

Copy and paste Frame 2 resize as needed and then with your freehand tool draw around  the frame and then Selections, Modify, Expand by 5.  Copy and paste Paper 2 and resize as needed.  Then Selections, Invert and then hit delete on your keyboard.  While still selected, Copy and paste your closeup tube and place where desired inside the frame, resize if needed.  Selections, invert and delete.  Sharpen your frame and add dropshadow to your frame and tube.

 Now you can place whatever elements you would like, resize as needed and place where desired.   Dropshadow your elements and main tube.  Here are the elements I used:

Element 1
Element 2
Element 3
Element 4
Element 5
Element 6
Element 18
Element 23


 Merge visible and add your copyrights and your name.
I used Foglihten No 07 for the name.
Merge all visible and save as PNG.
And your done.  Hope you enjoyed using my tutorial.

xoxo
Angie