Showing posts with label PTU Tutorial. Show all posts

Saturday, June 4, 2022

"Mommy Cuddles" CT for Scraps N Company


"Mommy Cuddles" CT for Scraps N Company
Kit is "Mommy Cuddles" by Luscious Ladee @ SNCO
This kit has 115 elements, 25 papers and 6 tubes
Tube is included in this kit and is by ©Yuki
It comes in 6 different color combinations and 
you can only use it with this kit.
All available @ Scraps N Company


Font Blessed Day
Mask: Any of your choice

FILTERS USED:  Gradient Glow, and Drop Shadow.

This tutorial was written by me on 6/4/2022, using my own ideas. Any resemblance to others is coincidental and accidental. This tutorial assumes you have a working knowledge of psp and is written in PSP9.

Please leave some love when downloading supplies. The artists/creators work hard to make/share their work with us, so let's be appreciative. Please use all correct copyright/license information and follow all TOU’s. Let’s give credit where credit is due.

As always, tutorials are only a guideline. If you don't have the exact supplies, use ones you have or ones you choose.


Ok let's begin. 

Copy and paste Paper 10 and apply your mask.  Merge group. 

Copy and paste your main tube of choice,  and resize as needed and place where desired.  Add dropshadow to the tube.

Now you can place whatever elements you would like, resize as needed and place where desired.   Dropshadow your elements and main tube.  Here are the elements I used:


3
4
6
10
13
23
24
27
32
33
34
37
40
42
50
51
73
75
79
80
86
87
93
97
103
108


Merge visible and add your copyrights and your name.

I used Blessed Day font for the name.

Merge all visible and save as PNG.

And your done.  Hope you enjoyed using my tutorial.

xoxo

Angie 
Monday, September 4, 2017

"Enchantress" CT for Magical Creations


"Enchantress" CT for Magical Creations
Tube is by The Hunter called "Sorceress"
I purchased mine for Scraps and the City which is no longer
open.  You can purchase this tube and many more of his at
Scraps N Company now.
Kit is by Magical Creations called "Enchantress"

Mask of choice

 Font:  Elementary Gothic

FILTERS USED:  Gradient Glow, and Drop Shadow.
This tutorial was written by me on 9/4/2017, using my own ideas. Any resemblance to others is coincidental and accidental. This tutorial assumes you have a working knowledge of psp and is written in PSP9.
Please leave some love when downloading supplies. The artists/creators work hard to make/share their work with us, so let's be appreciative. Please use all correct copyright/license information and follow all TOU’s. Let’s give credit where credit is due.
As always, tutorials are only a guideline. If you don't have the exact supplies, use ones you have or ones you choose.

Ok let's begin. 
Open a new canvas 650x650
Copy and paste Paper is Image00006 and apply your mask.  Merge group. 
Copy and paste your main tube of choice,  and resize as needed and place where desired.  Add dropshadow to the tube.
Now you can place whatever elements you would like, resize as needed and place where desired.   Dropshadow your elements and main tube.  Here are the elements I used:


00001
00003
00004
00013
00016
00018
00022
00023
00036
00038
00059
00064
00077
00085
00088
00089
00094
00100
00114
00115
00116
00119


 Merge visible and add your copyrights and your name.
I used Elementary Gothic font for the name.
Merge all visible and save as PNG.
And your done.  Hope you enjoyed using my tutorial.
xoxo
Angie

"The Witch is In" CT for Designz by Sue


"The Witch is In" CT for Designz by Sue
Tube is by Aurthur Crowe called "Magician Babe"
Scrap kit is called "Selina Witch 5" by Designz by Sue


Mask of choice

 Font: Witches Magic

Filters used: Gaussian Blur 3.0
Screen

FILTERS USED:  Gradient Glow, and Drop Shadow.
This tutorial was written by me on 9/4/2017, using my own ideas. Any resemblance to others is coincidental and accidental. This tutorial assumes you have a working knowledge of psp and is written in PSP9.
Please leave some love when downloading supplies. The artists/creators work hard to make/share their work with us, so let's be appreciative. Please use all correct copyright/license information and follow all TOU’s. Let’s give credit where credit is due.
As always, tutorials are only a guideline. If you don't have the exact supplies, use ones you have or ones you choose.

Ok let's begin. 
Open a new canvas 650x650
Copy and paste Paper 003 and apply your mask.  Merge group.  Copy and paste Frame 3 and resize as desired.  Click in side with the magic wand and then selection, modify, expand by 5.  Copy and pasted Paper 3, move under the frame, selections, invert, and delete on your keyboard.  Copy and paste your close up tube above the paper.  Invert and delete.  Duplicate tube and apply Gaussian Blur at 3.0 on the copy.  Then change the blend to Screen.  Drop shadow the frame and tube.
Copy and paste your main tube of choice,  and resize as needed and place where desired.  Add dropshadow to the tube.
Now you can place whatever elements you would like, resize as needed and place where desired.   Dropshadow your elements and main tube.  Here are the elements I used:

004
010
013
014
025
026
031
045
051
057
058
075
077
080

 Merge visible and add your copyrights and your name.
I used Witches Magic font for the name.
Merge all visible and save as PNG.
And your done.  Hope you enjoyed using my tutorial.
xoxo
Angie

Saturday, July 8, 2017

"Native Pride" CT for Designz by Sue


"Native Pride"  CT for Designz by Sue
Tube is called "Native American" by Di Halim at S&CO
Kit is called "Dream Catcher" by Designz by Sue
This beautiful kit is available at many stores
S&CO 

Mask of choice

 Font:  Dalek

FILTERS USED:  Gradient Glow, and Drop Shadow.
This tutorial was written by me on 7/8/2017, using my own ideas. Any resemblance to others is coincidental and accidental. This tutorial assumes you have a working knowledge of psp and is written in PSP9.
Please leave some love when downloading supplies. The artists/creators work hard to make/share their work with us, so let's be appreciative. Please use all correct copyright/license information and follow all TOU’s. Let’s give credit where credit is due.
As always, tutorials are only a guideline. If you don't have the exact supplies, use ones you have or ones you choose.

Ok let's begin. 
Open a new canvas 650x650
Copy and paste Paper 015 and apply your mask.  Merge group. 
Copy and paste your main tube of choice,  and resize as needed and place where desired.  Add dropshadow to the tube.
Now you can place whatever elements you would like, resize as needed and place where desired.   Dropshadow your elements and main tube.  Here are the elements I used:


001
003
009
010
011
012
015
016
021
022
023
031
032
037


 Merge visible and add your copyrights and your name.
I used Dalek font for the name.
Merge all visible and save as PNG.
And your done.  Hope you enjoyed using my tutorial.
xoxo
Angie

Saturday, May 20, 2017

"Farm Girl" CT for Scraps N Company


"Farm Girl" CT for Scraps N Company

PSP - I use 9 but any version should work.
Supplies:

This beautiful tube is called "Farm Girl 1" by Alehandra Vanhek
You must have a license to use their art.

This amazing matching kit is called "Farm Girl 1" by Kizzed by Kelz
You can purchase both at Scraps N Company


Tube: Here

Kit: Here

Mask of choice

 Font:  Cinnamon Cake

FILTERS USED:  Gradient Glow, and Drop Shadow.
This tutorial was written by me on 5/20/2017, using my own ideas. Any resemblance to others is coincidental and accidental. This tutorial assumes you have a working knowledge of psp and is written in PSP9.
Please leave some love when downloading supplies. The artists/creators work hard to make/share their work with us, so let's be appreciative. Please use all correct copyright/license information and follow all TOU’s. Let’s give credit where credit is due.
As always, tutorials are only a guideline. If you don't have the exact supplies, use ones you have or ones you choose.

Ok let's begin. 
Open a new canvas 650x650
Copy and paste Paper 1 and apply your mask.  Merge group. 
Copy and paste your main tube of choice,  and resize as needed and place where desired.  Add dropshadow to the tube.
Now you can place whatever elements you would like, resize as needed and place where desired.   Dropshadow your elements and main tube.  Here are the elements I used:


14
18
44
47
51
55
67
75
78
79
97
109
119


 Merge visible and add your copyrights and your name.
I used Cinnamon Cake font for the name.
Merge all visible and save as PNG.
And your done.  Hope you enjoyed using my tutorial.
xoxo
Angie

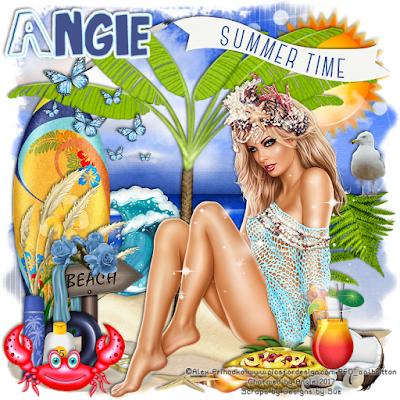
"Summertime" CT for Designs by Sue


"Summertime" CT for Designs by Sue

PSP - I use 9 but any version should work.
Supplies:

This beautiful tube is called "Coral" by Alex Prihodko
You must have a license to use their art.

This amazing kit called "Summer Girl 8" by Designs by Sue


Mask of choice

 Font:  Summertime Lovin

FILTERS USED:  Gradient Glow, and Drop Shadow.
This tutorial was written by me on 5/20/2017, using my own ideas. Any resemblance to others is coincidental and accidental. This tutorial assumes you have a working knowledge of psp and is written in PSP9.
Please leave some love when downloading supplies. The artists/creators work hard to make/share their work with us, so let's be appreciative. Please use all correct copyright/license information and follow all TOU’s. Let’s give credit where credit is due.
As always, tutorials are only a guideline. If you don't have the exact supplies, use ones you have or ones you choose.

Ok let's begin. 
Open a new canvas 650x650
Copy and paste Paper 12 and apply your mask.  Merge group. 
Copy and paste your main tube of choice,  and resize as needed and place where desired.  Add dropshadow to the tube.
Now you can place whatever elements you would like, resize as needed and place where desired.   Dropshadow your elements and main tube.  Here are the elements I used:


12
15
17
20
21
22
24
25
27
31
32
39
41
65
70
72
75
76
77
79
80
89
90


 Merge visible and add your copyrights and your name.
I used Summertime Lovin font for the name.
Merge all visible and save as PNG.
And your done.  Hope you enjoyed using my tutorial.
xoxo
Angie

"Dark Angel" CT for Fantasy Catz Designs


"Dark Angel" CT for Fantasy Catz Designs

PSP - I use 9 but any version should work.
Supplies:

This beautiful tube is called "Dark Angel" by VeryMany
You must have a license to use their art.

This amazing kit called "Heavens Gate" by Fantasy Catz Designs
She sells in many stores

Tube: Here


Mask of choice

 Font:  Pristina

FILTERS USED:  Gradient Glow, and Drop Shadow.
This tutorial was written by me on 5/20/2017, using my own ideas. Any resemblance to others is coincidental and accidental. This tutorial assumes you have a working knowledge of psp and is written in PSP9.
Please leave some love when downloading supplies. The artists/creators work hard to make/share their work with us, so let's be appreciative. Please use all correct copyright/license information and follow all TOU’s. Let’s give credit where credit is due.
As always, tutorials are only a guideline. If you don't have the exact supplies, use ones you have or ones you choose.

Ok let's begin. 
Open a new canvas 650x650
Copy and paste Paper 4 and apply your mask.  Merge group. 
Copy and paste your main tube of choice,  and resize as needed and place where desired.  Add dropshadow to the tube.
Now you can place whatever elements you would like, resize as needed and place where desired.   Dropshadow your elements and main tube.  Here are the elements I used:


7
14
15
20
21
23
26
33
46
47
49
52
56
65
67
83
105
110
112
118
124
126


 Merge visible and add your copyrights and your name.
I used Pristina font for the name.
Merge all visible and save as PNG.
And your done.  Hope you enjoyed using my tutorial.
xoxo
Angie
Sunday, May 7, 2017

"Ghostly Vows" CT for Bibi's Collection Scraps


"Ghostly Vows" CT for Bibi's Collection Scraps

PSP - I use 9 but any version should work.
Supplies:

This beautiful tube is called "Katrina" by TheHunter
You must have a license to use his art.

This amazing kit called "Gothic Innocence" by Bibi's Collection Scraps
Both are available for purchase at Scraps N Company

Tube: Here
Kit: Here

Mask of choice

 Font:  Grusskarten Gotisch

FILTERS USED:  Gradient Glow, and Drop Shadow.
This tutorial was written by me on 5/7/2017, using my own ideas. Any resemblance to others is coincidental and accidental. This tutorial assumes you have a working knowledge of psp and is written in PSP9.
Please leave some love when downloading supplies. The artists/creators work hard to make/share their work with us, so let's be appreciative. Please use all correct copyright/license information and follow all TOU’s. Let’s give credit where credit is due.
As always, tutorials are only a guideline. If you don't have the exact supplies, use ones you have or ones you choose.

Ok let's begin. 
Open a new canvas 650x650
Copy and paste Paper 3 and apply your mask.  Merge group. 
Copy and paste your main tube of choice,  and resize as needed and place where desired.  Add dropshadow to the tube.
Now you can place whatever elements you would like, resize as needed and place where desired.   Dropshadow your elements and main tube.  Here are the elements I used:


1
2
4
7
18
20
21
26
27
30
31
32
35
42
43
48
49
51
69
72
75
77
78
80
81
83
84
88
96


 Merge visible and add your copyrights and your name.
I used Grusskarten Gotisch font for the name.
Merge all visible and save as PNG.
And your done.  Hope you enjoyed using my tutorial.
xoxo
Angie

Saturday, May 6, 2017

"Sunset" CT for Scraps N Company


"Sunset" CT for Scraps N Company

PSP - I use 9 but any version should work.
Supplies:

This gorgeous tube is called "Sunset" by Ismael Rac
This beautiful kit is called "Gold Glamour" by Disturbed Scraps
You can purchase both at Scraps N Company
Tube: Here
Kit: Here


Mask of choice

 Font: Riesling

FILTERS USED:  Gradient Glow, and Drop Shadow.
This tutorial was written by me on 5/6/17, using my own ideas. Any resemblance to others is coincidental and accidental. This tutorial assumes you have a working knowledge of psp and is written in PSP9.
Please leave some love when downloading supplies. The artists/creators work hard to make/share their work with us, so let's be appreciative. Please use all correct copyright/license information and follow all TOU’s. Let’s give credit where credit is due.
As always, tutorials are only a guideline. If you don't have the exact supplies, use ones you have or ones you choose.

Ok let's begin. 
Open a new canvas 650x650
Copy and paste Paper 8 and apply your mask.  Merge group.  Duplicate the mask and then resize to 110%.  Copy and paste Frame  Element 71.  Click inside the frame with the magic wand and expand by 10.  Add new raster under the frame and copy and paste Paper 13 into selection.  Deselect.
Copy and paste your main tube of choice,  and resize as needed and place where desired.  Add dropshadow to the tube.  Erase any parts that stick out below the frame.
Now you can place whatever elements you would like, resize as needed and place where desired.   Dropshadow your elements and main tube.  Here are the elements I used:

1
2
5
8
14
17
20
42
51
62
65
74
77

 Merge visible and add your copyrights and your name.
I used Riesling font for the name.
Merge all visible and save as PNG.
And your done.  Hope you enjoyed using my tutorial.
xoxo
Angie

"Luna" CT for Graph Freaks


"Luna" CT for Graph Freaks

PSP - I use 9 but any version should work.
Supplies:

This beautiful tube is called "Luna" by Graph Freaks
You must have a license to use her art.

This tube has a matching kit called "Luna Goddess" by Disturbed Scraps
Both are available for purchase at Scraps N Company

Tube: Here
Kit: Here

Mask of choice

 Font:  Celestial

FILTERS USED:  Gradient Glow, and Drop Shadow.
This tutorial was written by me on 5/6/2017, using my own ideas. Any resemblance to others is coincidental and accidental. This tutorial assumes you have a working knowledge of psp and is written in PSP9.
Please leave some love when downloading supplies. The artists/creators work hard to make/share their work with us, so let's be appreciative. Please use all correct copyright/license information and follow all TOU’s. Let’s give credit where credit is due.
As always, tutorials are only a guideline. If you don't have the exact supplies, use ones you have or ones you choose.

Ok let's begin. 
Open a new canvas 650x650
Copy and paste Paper 10 and apply your mask.  Merge group. 
Copy and paste your main tube of choice,  and resize as needed and place where desired.  Add dropshadow to the tube.
Now you can place whatever elements you would like, resize as needed and place where desired.   Dropshadow your elements and main tube.  Here are the elements I used:


13
17
18
19
29
32
37
41
57
61
67
75
76


 Merge visible and add your copyrights and your name.
I used Celestial font for the name.
Merge all visible and save as PNG.
And your done.  Hope you enjoyed using my tutorial.
xoxo
Angie

"Midnight Bride" CT for Scraps N Company


"Midnight Bride" CT for Scraps N Company

PSP - I use 9 but any version should work.
Supplies:

Julia Fox tube called "Vampire 2"
Tube which you can get here at Scraps N Company
You must have a license to use his art.

Kit called "Vampire 4" by Kizzed By Kelz
Matching kit which you can get here Scraps N Company


Mask of choice

 Font:  Romantically Yours

FILTERS USED:  Gradient Glow, and Drop Shadow.
This tutorial was written by me on 5/6/2017, using my own ideas. Any resemblance to others is coincidental and accidental. This tutorial assumes you have a working knowledge of psp and is written in PSP9.
Please leave some love when downloading supplies. The artists/creators work hard to make/share their work with us, so let's be appreciative. Please use all correct copyright/license information and follow all TOU’s. Let’s give credit where credit is due.
As always, tutorials are only a guideline. If you don't have the exact supplies, use ones you have or ones you choose.

Ok let's begin. 
Open a new canvas 650x650
Copy and paste Paper 15 and apply your mask.  Merge group. 
Copy and paste your main tube of choice,  and resize as needed and place where desired.  Add dropshadow to the tube.
Now you can place whatever elements you would like, resize as needed and place where desired.   Dropshadow your elements and main tube.  Here are the elements I used:


12
31
43
44
53
69
73
83
100
110
129
132
134


 Merge visible and add your copyrights and your name.
I used Romantically Yours font for the name.
Merge all visible and save as PNG.
And your done.  Hope you enjoyed using my tutorial.
xoxo
Angie

"Mermaid Treasures" CT for Sassy Designs Unlimited


"Mermaid Treasures" CT for Sassy Designs Unlimited
PSP - I use 9 but any version should work.
Supplies:

Alex Prihodko tube called "Mermaid Girl 2"
Tube which you can get here at Pics for Design
You must have a license to use his art.

Kit called "Underwater Beachy Sea" by Sassy Designs Unlimited
Kit which you can get here Artistic Dreams Imaging


Mask of choice

 Font:  Reed of Love

FILTERS USED:  Gradient Glow, and Drop Shadow.
This tutorial was written by me on 5/6/2017, using my own ideas. Any resemblance to others is coincidental and accidental. This tutorial assumes you have a working knowledge of psp and is written in PSP9.
Please leave some love when downloading supplies. The artists/creators work hard to make/share their work with us, so let's be appreciative. Please use all correct copyright/license information and follow all TOU’s. Let’s give credit where credit is due.
As always, tutorials are only a guideline. If you don't have the exact supplies, use ones you have or ones you choose.

Ok let's begin. 
Open a new canvas 650x650
Copy and paste Paper 19 and apply your mask.  Merge group. 
Copy and paste your main tube of choice,  and resize as needed and place where desired.  Add dropshadow to the tube.
Now you can place whatever elements you would like, resize as needed and place where desired.   Dropshadow your elements and main tube.  Here are the elements I used:


Bird 1
Bird 2
Bird 3
Bubble 2
Clam
Coral 1
Coral 2
Crab 2
Grass 1
Grass 2
Palm Tree 2
Sand 2
Starfish
Treasure Chest
Wooden Bridge


 Merge visible and add your copyrights and your name.
I used Reed of Love font for the name.
Merge all visible and save as PNG.
And your done.  Hope you enjoyed using my tutorial.
xoxo
Angie

Tuesday, April 25, 2017

"You're Under Arrest" CT for Designs By Ali


"You're Under Arrest" CT for Designs By Ali
This kit is called "In Custody" by Designs By Ali
Which can be purchased at Mystical Scraps
Tube is called "Police Dept." by Michael Landefeld at Creative Design Outlet


Mask of choice

 Font:  Impact

FILTERS USED:  Gradient Glow, and Drop Shadow.
This tutorial was written by me on 4/26/2017, using my own ideas. Any resemblance to others is coincidental and accidental. This tutorial assumes you have a working knowledge of psp and is written in PSP9.
Please leave some love when downloading supplies. The artists/creators work hard to make/share their work with us, so let's be appreciative. Please use all correct copyright/license information and follow all TOU’s. Let’s give credit where credit is due.
As always, tutorials are only a guideline. If you don't have the exact supplies, use ones you have or ones you choose.

Ok let's begin. 
Open a new canvas 650x650
Copy and paste Paper 4 and apply your mask.  Merge group. 
Copy and paste your main tube of choice,  and resize as needed and place where desired.  Add dropshadow to the tube.
Now you can place whatever elements you would like, resize as needed and place where desired.   Dropshadow your elements and main tube.  Here are the elements I used:

7
8
9
17
20
30
32
35
43
46
48
40
62
70
76
82


 Merge visible and add your copyrights and your name.
I used Impact font for the name.
Merge all visible and save as PNG.
And your done.  Hope you enjoyed using my tutorial.
xoxo
Angie

"It's 4:20 Somewhere" CT tutorial for Joyful Kreationz


"It's 4:20 Somewhere" CT tutorial for Joyful Kreationz

PSP - I use 9 but any version should work.
Supplies:

Souldesigner  tube called "Hippie Girl"
Tube which you can get here at La Boutique Pink
You must have a license to use her art.

Kit called "It's 4:20 Somewhere" by Joyful Kreationz
Kit which you can get here Hania's Design


Mask of choice

 Font:  Please Show Me Love

FILTERS USED:  Gradient Glow, and Drop Shadow.
This tutorial was written by me on 4/25/2017, using my own ideas. Any resemblance to others is coincidental and accidental. This tutorial assumes you have a working knowledge of psp and is written in PSP9.
Please leave some love when downloading supplies. The artists/creators work hard to make/share their work with us, so let's be appreciative. Please use all correct copyright/license information and follow all TOU’s. Let’s give credit where credit is due.
As always, tutorials are only a guideline. If you don't have the exact supplies, use ones you have or ones you choose.

Ok let's begin. 
Open a new canvas 650x650
Copy and paste Paper 8 and apply your mask.  Merge group. 
Copy and paste your main tube of choice,  and resize as needed and place where desired.  Add dropshadow to the tube.
Now you can place whatever elements you would like, resize as needed and place where desired.   Dropshadow your elements and main tube.  Here are the elements I used:


3
20
21
24
25
26
27
36
37
38
44
53
54
55
58
63
64
76
81
82


 Merge visible and add your copyrights and your name.
I used Please show Me Love font for the name.
Merge all visible and save as PNG.
And your done.  Hope you enjoyed using my tutorial.
xoxo
Angie


Sunday, April 23, 2017

"Dreams Of the Sea" CT for Creative and Freeky Scraps


"Dreams Of the Sea" CT for Creative and Freeky Scraps

PSP - I use 9 but any version should work.
Supplies:

VeryMany tube called "Mermaid"
Tube which you can get here at VeryMany Tubes
You must have a license to use her art.

Kit called "Seaside" by Creative Scraps by Crys
Kit which you can get here Mystical Scraps


Mask of choice

 Font:  Life's A Beach

FILTERS USED:  Gradient Glow, and Drop Shadow.
This tutorial was written by me on 4/23/2017, using my own ideas. Any resemblance to others is coincidental and accidental. This tutorial assumes you have a working knowledge of psp and is written in PSP9.
Please leave some love when downloading supplies. The artists/creators work hard to make/share their work with us, so let's be appreciative. Please use all correct copyright/license information and follow all TOU’s. Let’s give credit where credit is due.
As always, tutorials are only a guideline. If you don't have the exact supplies, use ones you have or ones you choose.

Ok let's begin. 
Open a new canvas 650x650
Copy and paste Paper15 and apply your mask.  Merge group. 
Copy and paste your main tube of choice,  and resize as needed and place where desired.  Add dropshadow to the tube.
Now you can place whatever elements you would like, resize as needed and place where desired.   Dropshadow your elements and main tube.  Here are the elements I used:


BeachSign
Bottle2
Grass
Lantern
Lighthouse
Net1
PalmTree
Parrot
Reeds
Rock
SandCastle
Shell1
Shell2
Shell3
Shell4
Sparkles
Starfish1
Sticks
Wave
WordArt4


 Merge visible and add your copyrights and your name.
I used Life's A Beach font for the name.
Merge all visible and save as PNG.
And your done.  Hope you enjoyed using my tutorial.
xoxo
Angie