
Showing posts with label PFD. Show all posts

Saturday, July 8, 2017

"Gothika" CT for Magical Creations


"Gothika" CT for Magical Creations
Tube is called "Vicious Viv" by Jose Cano
Kit is called "Gothika" by Magical Creations
You can get this kit from these stores

Mask of choice

 Font:  Inked God

FILTERS USED:  Gradient Glow, and Drop Shadow.
This tutorial was written by me on 7/8/2017, using my own ideas. Any resemblance to others is coincidental and accidental. This tutorial assumes you have a working knowledge of psp and is written in PSP9.
Please leave some love when downloading supplies. The artists/creators work hard to make/share their work with us, so let's be appreciative. Please use all correct copyright/license information and follow all TOU’s. Let’s give credit where credit is due.
As always, tutorials are only a guideline. If you don't have the exact supplies, use ones you have or ones you choose.

Ok let's begin. 
Open a new canvas 650x650
Copy and paste Paper 20 and apply your mask.  Merge group. 
Copy and paste your main tube of choice,  and resize as needed and place where desired.  Add dropshadow to the tube.
Now you can place whatever elements you would like, resize as needed and place where desired.   Dropshadow your elements and main tube.  Here are the elements I used:


2
32
51
54
56
58
60
66
78
85
92
130
131


 Merge visible and add your copyrights and your name.
I used Inked God font for the name.
Merge all visible and save as PNG.
And your done.  Hope you enjoyed using my tutorial.
xoxo
Angie

"Native Pride" CT for Designz by Sue


"Native Pride"  CT for Designz by Sue
Tube is called "Native American" by Di Halim at S&CO
Kit is called "Dream Catcher" by Designz by Sue
This beautiful kit is available at many stores
S&CO 

Mask of choice

 Font:  Dalek

FILTERS USED:  Gradient Glow, and Drop Shadow.
This tutorial was written by me on 7/8/2017, using my own ideas. Any resemblance to others is coincidental and accidental. This tutorial assumes you have a working knowledge of psp and is written in PSP9.
Please leave some love when downloading supplies. The artists/creators work hard to make/share their work with us, so let's be appreciative. Please use all correct copyright/license information and follow all TOU’s. Let’s give credit where credit is due.
As always, tutorials are only a guideline. If you don't have the exact supplies, use ones you have or ones you choose.

Ok let's begin. 
Open a new canvas 650x650
Copy and paste Paper 015 and apply your mask.  Merge group. 
Copy and paste your main tube of choice,  and resize as needed and place where desired.  Add dropshadow to the tube.
Now you can place whatever elements you would like, resize as needed and place where desired.   Dropshadow your elements and main tube.  Here are the elements I used:


001
003
009
010
011
012
015
016
021
022
023
031
032
037


 Merge visible and add your copyrights and your name.
I used Dalek font for the name.
Merge all visible and save as PNG.
And your done.  Hope you enjoyed using my tutorial.
xoxo
Angie

Saturday, May 6, 2017

"Mermaid Treasures" CT for Sassy Designs Unlimited


"Mermaid Treasures" CT for Sassy Designs Unlimited
PSP - I use 9 but any version should work.
Supplies:

Alex Prihodko tube called "Mermaid Girl 2"
Tube which you can get here at Pics for Design
You must have a license to use his art.

Kit called "Underwater Beachy Sea" by Sassy Designs Unlimited
Kit which you can get here Artistic Dreams Imaging


Mask of choice

 Font:  Reed of Love

FILTERS USED:  Gradient Glow, and Drop Shadow.
This tutorial was written by me on 5/6/2017, using my own ideas. Any resemblance to others is coincidental and accidental. This tutorial assumes you have a working knowledge of psp and is written in PSP9.
Please leave some love when downloading supplies. The artists/creators work hard to make/share their work with us, so let's be appreciative. Please use all correct copyright/license information and follow all TOU’s. Let’s give credit where credit is due.
As always, tutorials are only a guideline. If you don't have the exact supplies, use ones you have or ones you choose.

Ok let's begin. 
Open a new canvas 650x650
Copy and paste Paper 19 and apply your mask.  Merge group. 
Copy and paste your main tube of choice,  and resize as needed and place where desired.  Add dropshadow to the tube.
Now you can place whatever elements you would like, resize as needed and place where desired.   Dropshadow your elements and main tube.  Here are the elements I used:


Bird 1
Bird 2
Bird 3
Bubble 2
Clam
Coral 1
Coral 2
Crab 2
Grass 1
Grass 2
Palm Tree 2
Sand 2
Starfish
Treasure Chest
Wooden Bridge


 Merge visible and add your copyrights and your name.
I used Reed of Love font for the name.
Merge all visible and save as PNG.
And your done.  Hope you enjoyed using my tutorial.
xoxo
Angie

Thursday, August 27, 2015

"Hot Summer Nights" CT for Rebel Dezigns


"Hot Summer Nights" CT for Rebel Dezigns

PSP - I use 9 but any version should work.
Supplies:

Alex Prihodko tube called "Coral"

Kit called "Summer Night Mini" by Rebel Dezigns


Mask by Insatiable Dreams

 Font: Vivaldi

FILTERS USED:  Gradient Glow, and Drop Shadow.
This tutorial was written by me on 8/27/2015, using my own ideas. Any resemblance to others is coincidental and accidental. This tutorial assumes you have a working knowledge of psp and is written in PSP9.
Please leave some love when downloading supplies. The artists/creators work hard to make/share their work with us, so let's be appreciative. Please use all correct copyright/license information and follow all TOU’s. Let’s give credit where credit is due.
As always, tutorials are only a guideline. If you don't have the exact supplies, use ones you have or ones you choose.

Ok let's begin. 
Open a new canvas 650x650
Copy and paste Paper 3 and apply your mask.  Merge group. 
Copy and paste your main tube of choice,  and resize as needed and place where desired.  Add dropshadow to the tube.
Now you can place whatever elements you would like, resize as needed and place where desired.   Dropshadow your elements and main tube.  Here are the elements I used:

SN-wa wordart
ele5
ele6
ele11
ele12
ele14
ele15
ele17
ele18
ele20
ele24
ele27
ele29

 Merge visible and add your copyrights and your name.
I used Vivaldi font for the name.
Merge all visible and save as PNG.
And your done.  Hope you enjoyed using my tutorial.
xoxo
Angie

Saturday, August 8, 2015

"Alvida's Pirate Dream" CT for Michelle's Myths


"Alvida's Pirate Dream" CT for Michelle's Myths
PSP - I use 9 but any version should work.
Supplies:
 
Artist: "Alvida" by Designs by Norella
Poser Tube here PFD or you can get it from
Designs by Norella
You must have a license to use her art.

Scrap Kit: "Alvida's Pirate Dream" a matching kit by Michelle's Myths
Kit here at PFD or you can get it at any of these sites
Tiny Turtle Designs
Smiley Creations
 
Mask of choice
 
 Font: Pieces of Eight

FILTERS USED:  Gradient Glow, and Drop Shadow.
This tutorial was written by me on 8/8/2015, using my own ideas. Any resemblance to others is coincidental and accidental. This tutorial assumes you have a working knowledge of psp and is written in PSP9.
Please leave some love when downloading supplies. The artists/creators work hard to make/share their work with us, so let's be appreciative. Please use all correct copyright/license information and follow all TOU’s. Let’s give credit where credit is due.
As always, tutorials are only a guideline. If you don't have the exact supplies, use ones you have or ones you choose.

Ok let's begin. 
Open a new canvas 650x650
Copy and paste Paper 12 and apply your mask.  Merge group. 
Copy and paste your main tube of choice,  and resize as needed and place where desired.  Add dropshadow to the tube.
Now you can place whatever elements you would like, resize as needed and place where desired.   Dropshadow your elements and main tube.  Here are the elements I used:

23
24
28
30
35
40
47
49
50
51
52
53
76
77
81
88
89
93
95
97
98
100
103
108
109
113
115
116
117
118
120
121
122
123

 Merge visible and add your copyrights and your name.
I used Pieces of Eight font for the name.
Merge all visible and save as PNG.
And your done.  Hope you enjoyed using my tutorial.
xoxo
Angie
 

Wednesday, July 29, 2015

"Born In The USA" CT for ChocUKDesigns


"Born In The USA" CT for ChocUKDesigns

PSP - I use 9 but any version should work.
Supplies:

Artist: "Devoted" by Keith Garvey
You must have a license to use his art.

Scrap Kit: "Born In The USA" by ChocUKDesigns


Mask of choice

 Font: Easy Rider font


FILTERS USED:  Gradient Glow, and Drop Shadow.
This tutorial was written by me on 7/29/2015, using my own ideas. Any resemblance to others is coincidental and accidental. This tutorial assumes you have a working knowledge of psp and is written in PSP9.
Please leave some love when downloading supplies. The artists/creators work hard to make/share their work with us, so let's be appreciative. Please use all correct copyright/license information and follow all TOU’s. Let’s give credit where credit is due.
As always, tutorials are only a guideline. If you don't have the exact supplies, use ones you have or ones you choose.

Ok let's begin. 
Open a new canvas 650x650
Copy and paste Paper 9 and apply your mask.  Merge group. 
Copy and paste your main tube of choice,  and resize as needed and place where desired.  Add dropshadow to the tube.
Now you can place whatever elements you would like, resize as needed and place where desired.   Dropshadow your elements and main tube.  Here are the elements I used:

3
4
5
7
54
60
66
70
75
78
79
90
93
94


 Merge visible and add your copyrights and your name.
I used Easy Rider font for the name.
Merge all visible and save as PNG.
And your done.  Hope you enjoyed using my tutorial.
xoxo
Angie

"Let Freedom Ring" CT for Dance In The Rain


"Let Freedom Ring" CT for Dance In The Rain

PSP - I use 9 but any version should work.
Supplies:

Artist: "Patriotism" by Keith Garvey
You must have a license to use his art.

Scrap Kit: "USA Party" by Dance In The Rain


Mask of choice

 Font: Diamond Dust font


FILTERS USED:  Gradient Glow, and Drop Shadow.
This tutorial was written by me on 7/29/2015, using my own ideas. Any resemblance to others is coincidental and accidental. This tutorial assumes you have a working knowledge of psp and is written in PSP9.
Please leave some love when downloading supplies. The artists/creators work hard to make/share their work with us, so let's be appreciative. Please use all correct copyright/license information and follow all TOU’s. Let’s give credit where credit is due.
As always, tutorials are only a guideline. If you don't have the exact supplies, use ones you have or ones you choose.

Ok let's begin. 
Open a new canvas 650x650
Copy and paste Paper 8 and apply your mask.  Merge group. 
Copy and paste your main tube of choice,  and resize as needed and place where desired.  Add dropshadow to the tube.
Now you can place whatever elements you would like, resize as needed and place where desired.   Dropshadow your elements and main tube.  Here are the elements I used:

1
2
9
10
14
15
16
17
30
37
38
93
96
100
109
148


 Merge visible and add your copyrights and your name.
I used Diamond Dust font for the name.
Merge all visible and save as PNG.
And your done.  Hope you enjoyed using my tutorial.
xoxo
Angie

Monday, June 15, 2015

"Ocean Paradise" CT for Devilish Dezines


"Ocean Paradise" CT for Devilish Dezines

PSP - I use 9 but any version should work.
Supplies:

Artist: "Mermaid 5" by Eugene Rzhevskii @ PFD
You must have a license to use his art.

Scrap Kit: "Sea Crown" by Devilish Dezines @ S&CO

Mask of choice

 Font: Blue Ocean

FILTERS USED:  Gradient Glow, and Drop Shadow.
This tutorial was written by me on 6/15/2015, using my own ideas. Any resemblance to others is coincidental and accidental. This tutorial assumes you have a working knowledge of psp and is written in PSP9.
Please leave some love when downloading supplies. The artists/creators work hard to make/share their work with us, so let's be appreciative. Please use all correct copyright/license information and follow all TOU’s. Let’s give credit where credit is due.
As always, tutorials are only a guideline. If you don't have the exact supplies, use ones you have or ones you choose.

Ok let's begin. 
Open a new canvas 650x650
Copy and paste Paper 2 and apply your mask.  Merge group. 
Copy and paste your main tube of choice,  and resize as needed and place where desired.  Add dropshadow to the tube.
Now you can place whatever elements you would like, resize as needed and place where desired.   Dropshadow your elements and main tube.  Here are the elements I used:

element4
element14
element16
element19
element20
element23
element27
element33
element39
element40
element42
element44
element46
element47
element48
element50


 Merge visible and add your copyrights and your name.
I used Blue Ocean for the name.
Merge all visible and save as PNG.
And your done.  Hope you enjoyed using my tutorial.
xoxo
Angie

"Magical Realm" CT for Heartbeatz Creationz / DNScraps


"Magical Realm" CT for Heartbeatz Creationz / DNScraps

PSP - I use 9 but any version should work.
Supplies:

Artist: "Vampy" by Nocturne @ Pics for Design
You must have a license to use this art.

Scrap Kit: "Evidence" by DNScraps @ Heartbeatz Creationz


Mask of choice

 Font: Walkiria

FILTERS USED:  Gradient Glow, and Drop Shadow.
This tutorial was written by me on 6/15/2015, using my own ideas. Any resemblance to others is coincidental and accidental. This tutorial assumes you have a working knowledge of psp and is written in PSP9.
Please leave some love when downloading supplies. The artists/creators work hard to make/share their work with us, so let's be appreciative. Please use all correct copyright/license information and follow all TOU’s. Let’s give credit where credit is due.
As always, tutorials are only a guideline. If you don't have the exact supplies, use ones you have or ones you choose.

Ok let's begin. 
Open a new canvas 650x650
Copy and paste Paper 5 and apply your mask.  Merge group. 
Copy and paste your main tube of choice,  and resize as needed and place where desired.  Add dropshadow to the tube.
Now you can place whatever elements you would like, resize as needed and place where desired.   Dropshadow your elements and main tube.  Here are the elements I used:

boat
broom2
castle
earth
earth2
lights
morter
plants
post
ray
skulls
sparkles
tree
unicorn
watter
cauldron
web


 Merge visible and add your copyrights and your name.
I used Walkiria for the name.
Merge all visible and save as PNG.
And your done.  Hope you enjoyed using my tutorial.
xoxo
Angie

Saturday, May 30, 2015

"Butterfly Garden" CT for Michelle's Myths


"Butterfly Garden" CT for Michelle's Myths

PSP - I use 9 but any version should work.
Supplies:

Artist: "Butterfly" by Alex Prihodko @ PFD
You must have a license to use this art.

Scrap Kit: "Butterfly Garden" by Michelle's Myths
And here: Smiley Creations


Mask of choice

 Font: buGlenda

FILTERS USED:  Gradient Glow, and Drop Shadow.
This tutorial was written by me on 5/30/2015, using my own ideas. Any resemblance to others is coincidental and accidental. This tutorial assumes you have a working knowledge of psp and is written in PSP9.
Please leave some love when downloading supplies. The artists/creators work hard to make/share their work with us, so let's be appreciative. Please use all correct copyright/license information and follow all TOU’s. Let’s give credit where credit is due.
As always, tutorials are only a guideline. If you don't have the exact supplies, use ones you have or ones you choose.

Ok let's begin. 
Open a new canvas 650x650
Copy and paste Paper 2 and apply your mask.  Merge group. 
Copy and paste your main tube of choice,  and resize as needed and place where desired.  Add dropshadow to the tube.
Now you can place whatever elements you would like, resize as needed and place where desired.   Dropshadow your elements and main tube.  Here are the elements I used:

1
7
8
11
19
20
23
34
35
36
38
42
43
44
45
46
48
59
63
70
72
75
78
86
88
90
95
96
98

 Merge visible and add your copyrights and your name.
I used buGlenda for the name.
Merge all visible and save as PNG.
And your done.  Hope you enjoyed using my tutorial.
xoxo
Angie
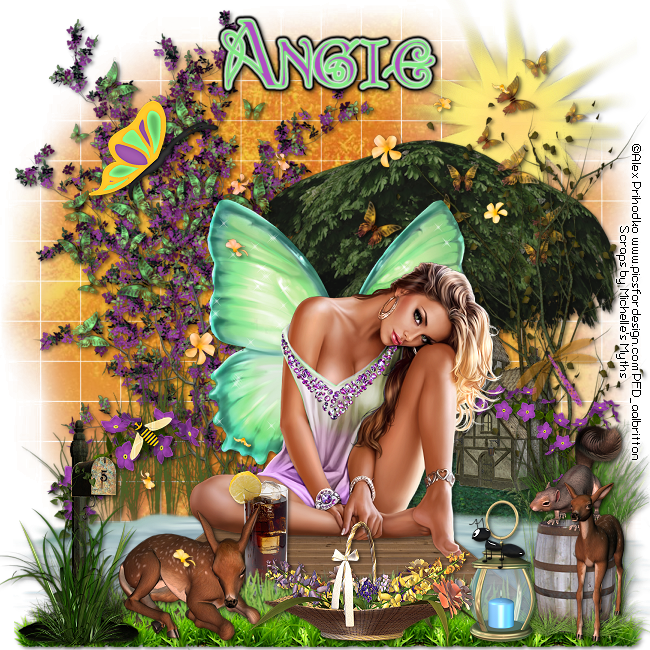
Thursday, May 28, 2015

"Calming Skies" CT for Heartbeatz Creationz / Jackie's Jewels


"Calming Skies" CT for Heartbeatz Creationz / Jackie's Jewels

PSP - I use 9 but any version should work.
Supplies:

Artist: "Mermaid Girl" by Alex Prihodko @ Pics for Design
You must have a license to use this art.

Scrap Kit: "Calming Skies" by Jackie's Jewels @ Heartbeatz Creationz


Mask of choice

 Font: Blue Ocean

FILTERS USED:  Gradient Glow, and Drop Shadow.
This tutorial was written by me on 5/28/2015, using my own ideas. Any resemblance to others is coincidental and accidental. This tutorial assumes you have a working knowledge of psp and is written in PSP9.
Please leave some love when downloading supplies. The artists/creators work hard to make/share their work with us, so let's be appreciative. Please use all correct copyright/license information and follow all TOU’s. Let’s give credit where credit is due.
As always, tutorials are only a guideline. If you don't have the exact supplies, use ones you have or ones you choose.

Ok let's begin. 
Open a new canvas 650x650
Copy and paste Paper 3 and apply your mask.  Merge group. 
Copy and paste your main tube of choice,  and resize as needed and place where desired.  Add dropshadow to the tube.
Now you can place whatever elements you would like, resize as needed and place where desired.   Dropshadow your elements and main tube.  Here are the elements I used:

JJS_9
JJS_10
JJS_11
JJS_13
JJS_16
JJS_22
JJS_26
JJS_29
JJS_30
JJS_40
JJS_54
JJS_55
JJS_60
JJS_63
JJS_64
JJS_65
JJS_67
JJS_71
JJS_72
JJS_74
JJS_81
JJS_82
JJS_84

 Merge visible and add your copyrights and your name.
I used Blue Ocean for the name.
Merge all visible and save as PNG.
And your done.  Hope you enjoyed using my tutorial.
xoxo
Angie

"Tropical Dreams" CT for Mellie Beans


"Tropical Dreams" CT for Mellie Beans

PSP - I use 9 but any version should work.
Supplies:

Artist: "Angelica" by Alehandra_Vanhek @ Pics for Design
You must have a license to use her art.

Scrap Kit: "Tropical Dreams" by Mellie Beans


Mask of choice

 Font: KelliLynn

FILTERS USED:  Gradient Glow, and Drop Shadow.
This tutorial was written by me on 5/28/2015, using my own ideas. Any resemblance to others is coincidental and accidental. This tutorial assumes you have a working knowledge of psp and is written in PSP9.
Please leave some love when downloading supplies. The artists/creators work hard to make/share their work with us, so let's be appreciative. Please use all correct copyright/license information and follow all TOU’s. Let’s give credit where credit is due.
As always, tutorials are only a guideline. If you don't have the exact supplies, use ones you have or ones you choose.

Ok let's begin. 
Open a new canvas 650x650
Copy and paste Beach Paper and apply your mask.  Merge group. 
Copy and paste your main tube of choice,  and resize as needed and place where desired.  Add dropshadow to the tube.
Now you can place whatever elements you would like, resize as needed and place where desired.   Dropshadow your elements and main tube.  Here are the elements I used:

bird of paradise flower
bird
butterfly
clouds
cocktail
conch shell
coral
Fern bush
freesia
lillies
palm tree
parrot
sand
shell 1
shoreline
sign
starfish
sun

 Merge visible and add your copyrights and your name.
I used KelliLynn for the name.
Merge all visible and save as PNG.
And your done.  Hope you enjoyed using my tutorial.
xoxo
Angie

Wednesday, May 27, 2015

"Pretty In Pink" CT for Dance In The Rain


"Pretty In Pink" CT for Dance In The Rain

PSP - I use 9 but any version should work.
Supplies:

Artist: "Matthews-17-1" by Amy Matthews @ CDO
You must have a license to use her art.

Scrap Kit: "Cute Helen" by Dance In The Rain

Mask of choice

 Font: Secret Recipe

FILTERS USED:  Gradient Glow, and Drop Shadow.
This tutorial was written by me on 5/27/2015, using my own ideas. Any resemblance to others is coincidental and accidental. This tutorial assumes you have a working knowledge of psp and is written in PSP9.
Please leave some love when downloading supplies. The artists/creators work hard to make/share their work with us, so let's be appreciative. Please use all correct copyright/license information and follow all TOU’s. Let’s give credit where credit is due.
As always, tutorials are only a guideline. If you don't have the exact supplies, use ones you have or ones you choose.

Ok let's begin. 
Open a new canvas 650x650
Copy and paste Paper 18 and apply your mask.  Merge group.  Copy and paste your frame, I used element 66 for my frame.  Click inside with your magic wand and selections, modify, expand by 5.  Copy and paste paper 12.  Invert and delete on your keyboard.
Copy and paste your main tube of choice,  and resize as needed and place where desired.  Add dropshadow to the tube.
Now you can place whatever elements you would like, resize as needed and place where desired.   Dropshadow your elements and main tube.  Here are the elements I used:

4
5
6
9
21
24
26
28
30
65
66
72

 Merge visible and add your copyrights and your name.
I used Secret Recipe for the name.
Merge all visible and save as PNG.
And your done.  Hope you enjoyed using my tutorial.
xoxo
Angie


"Vampire Lust" CT for ChocUKDesigns


"Vampire Lust" CT for ChocUKDesigns

PSP - I use 9 but any version should work.
Supplies:

Artist: "Vamp" by VeryMany
You must have a license to use this art.

Scrap Kit: "Gothicfornia Dreaming" by ChocUKDesigns
And here: Smiley Creations

Mask of choice

 Font: Luna Bar

FILTERS USED:  Gradient Glow, and Drop Shadow.
This tutorial was written by me on 5/27/2015, using my own ideas. Any resemblance to others is coincidental and accidental. This tutorial assumes you have a working knowledge of psp and is written in PSP9.
Please leave some love when downloading supplies. The artists/creators work hard to make/share their work with us, so let's be appreciative. Please use all correct copyright/license information and follow all TOU’s. Let’s give credit where credit is due.
As always, tutorials are only a guideline. If you don't have the exact supplies, use ones you have or ones you choose.

Ok let's begin. 
Open a new canvas 650x650
Copy and paste Paper 12 and apply your mask.  Merge group. 
Copy and paste your main tube of choice,  and resize as needed and place where desired.  Add dropshadow to the tube.
Now you can place whatever elements you would like, resize as needed and place where desired.   Dropshadow your elements and main tube.  Here are the elements I used:

3
13
19
23
29
30
49
69
107
123
126
129
150
186

 Merge visible and add your copyrights and your name.
I used Luna Bar for the name.
Merge all visible and save as PNG.
And your done.  Hope you enjoyed using my tutorial.
xoxo
Angie

Friday, May 15, 2015

"Black Magic Woman" CT for Michelle's Myths


"Black Magic Woman" CT for Michelle's Myths

Artist: "Witch 3" by Alex Prihodko @ PFD
You must have a license to use this art.

Scrap Kit: "Black Magic" by Michelle's Myths
And here: Smiley Creations


PSP - I use 9 but any version should work.
Supplies:

Mask of choice

Artist: "Witch 3" by Alex Prihodko @ PFD
You must have a license to use this art.

Scrap Kit: "Black Magic" by Michelle's Myths
And here: Smiley Creations

 Font: Redstar

FILTERS USED:  Gradient Glow, and Drop Shadow.
This tutorial was written by me on 5/15/2015, using my own ideas. Any resemblance to others is coincidental and accidental. This tutorial assumes you have a working knowledge of psp and is written in PSP9.
Please leave some love when downloading supplies. The artists/creators work hard to make/share their work with us, so let's be appreciative. Please use all correct copyright/license information and follow all TOU’s. Let’s give credit where credit is due.
As always, tutorials are only a guideline. If you don't have the exact supplies, use ones you have or ones you choose.

Ok let's begin. 
Open a new canvas 650x650
Copy and paste Paper 4 and apply your mask.  Merge group. 
Copy and paste your main tube of choice,  and resize as needed and place where desired.  Add dropshadow to the tube.
Now you can place whatever elements you would like, resize as needed and place where desired.   Dropshadow your elements and main tube.  Here are the elements I used:

5
8
10
14
18
23
25
27
30
31
33
36
38
46
49
56
66
68
71
72
73
74
91

 Merge visible and add your copyrights and your name.
I used Redstar for the name.
Merge all visible and save as PNG.
And your done.  Hope you enjoyed using my tutorial.
xoxo
Angie